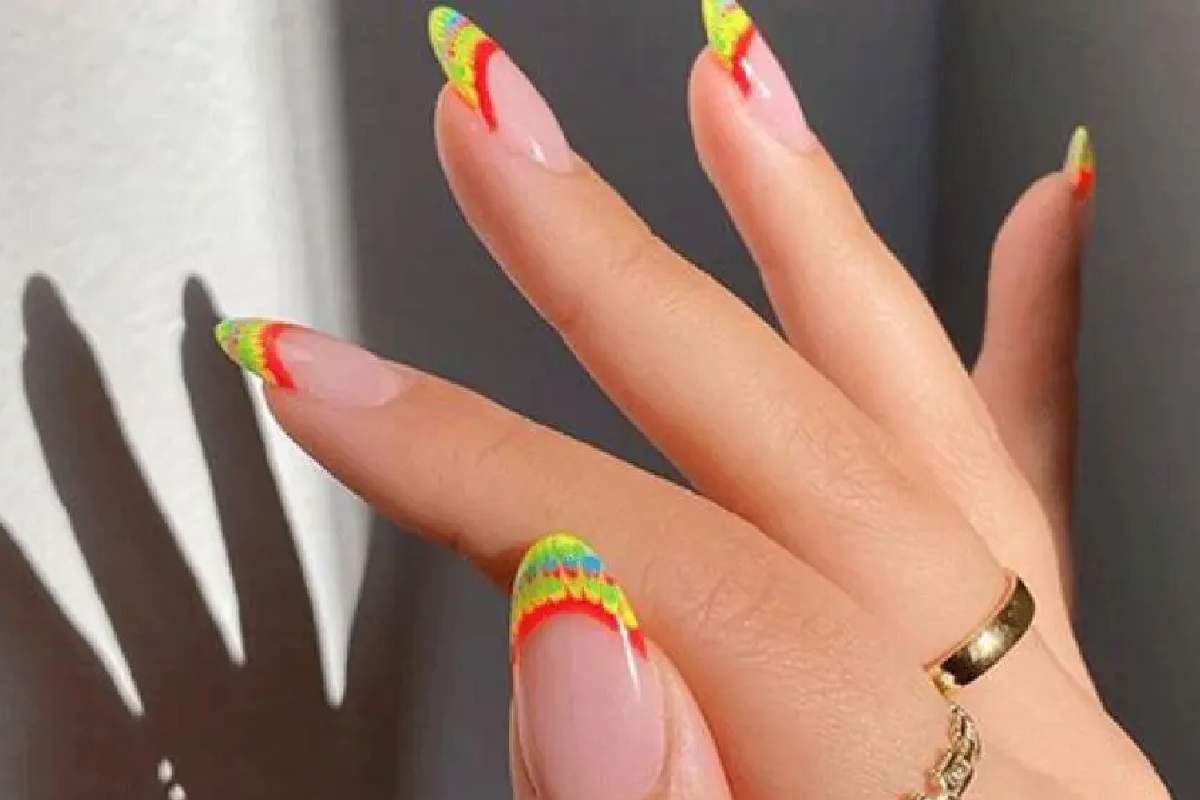
Tie Dye Nails means applying tie dye designs on nails. Everyone is trying to be beautiful now, and being trendy has also increased a lot. According to the changing technology, tie dye nails are one of the many make-up products available in the market. There are many types of nail designs available in the market, one of which is Tie Dye Nails.
Tie Dye Nails: The tie dye print became a symbol of the hippie movement in the 60s and 70s, having Janis Joplin, one of the most influential figures in music history, as an adept. However, this combination of colours when dyeing fabrics is ancient in Asian countries and on the African continent.
Over time, customization invaded the catwalks of the fashion world and became a reference not only for clothes. More recently, the DIY concept has turned tie dye nails into a way of expressing creativity.
More than a technique, tie-dye is considered an art form. In fabrics, dyes are applied in the folds and bindings, giving shape to unusual and unique prints.
Tie Dye is an ancient technique that dyes fabrics in different colours. In nail art, it started to will explored a few years ago.
Table of Contents
How To Make Tie Dye Nails?
The techniques used to make tie-dye nails are diverse. You can use a sponge, brush and even water to give more life to your productions.
The possibilities of colour combinations are diverse, but pastel and neon tones are the most used. Check out the step by step, which products to use and tips to rock nail art below:
With Sponge
To make tie dye nails with a sponge, you will need a sponge; it can be suitable for makeup or dishwashing (the yellow part). In addition, the base, white nail polish and the colours of your choice also need to be on hand. Shall we learn to do it?
Start By Applying A Colourless Base Coat On Your Tie Dye Nails
Then use a layer of white nail polish on all nails to create the tie dye nails background and let it dry well. Place the nail polishes of the chosen colours on the sponge, one next to the other. Then, tap the nails for a smoky effect.
As the sponge sucks up the enamel, it may be necessary to repeat the process a few times until you reach the desired coverage. Wait for it to dry and clean the edges to remove excess nail polish;
In The Water -Tie Dye Nails
To make tie-dye nails in water, you will need a glass of cold water, base, white nail polish and at least three colours of your choice. Ideally, these are more fluid to open better in the water. So let’s go step by step:
Start by applying foundation and then white to create the background. Wait for it to dry well;
In the glass of water, tiny drip drops, one on top of the other, of nail polish. Each drop must do in sequence so the enamel does not dry;
Use a toothpick to create shapes in the drops quickly, so the nail polish doesn’t dry out;
Then, dip one finger at a time in the water to transfer the design;
To finish, apply a top coat or extra shine to give a mirrored effect and prolong the duration.
With Brush – Tie Dye Nails
There are two possibilities to make tie-dye nails with a brush: the enamel brush itself or a brush with thin bristles, like those used in nail art. Here you will also need the base, the white enamel to give the background and three to four colours to create the print. Come on?
After applying the base and white nail polish, let them dry and add small portions of nail polish to the nail, varying the colours;
Interleave the colours in different formats and don’t worry about proportionality because the objective is to maintain a specific deformity.
To blend the colours, you can use a piece of firm plastic. Give it a light tap to bring the shades together. If you prefer, also use the sponge gently to give the same effect.
Please wait for it to dry and finish with the extra shine or top coat to have beautiful nails for longer.
With the Extra Fine Brush
The beginning is the same, with base and enamel in white to create the background. Use the colour you want and start from the centre of the nail making small stripes, forming a spiral.
It is necessary to brush each colour, one by one, joining them in a spiral, until completing the entire nail. Another way is, instead of the spiral movement, to make circles. Start at the centre of the nail with a small process and complete with larger ones until you complete the entire nail.
Then use a skinny bevelled brush to unite the colours, giving light taps between them. Finish off with the extra shine or a very thin glitter to give a different effect.
Friendly tip: as these processes require a particular effort, you can use the “only child” technique, that is, do the tie dye nails only on the nail of the ring finger.
Frenchie
For francesinha tie dye nails, you can opt for powdered pigments, widely used in elongated nails, or the nail polish itself. Separate the products and get to work:
- Apply the base to the nails and then a lighter nail polish;
- Then make the white francesinha in the shape you like;
If you opt for pigment, use a brush with a sponge and intersperse the colours along the francesinha with the white enamel still wet to better absorb the powder. Finish with a top coat;
With the nail polish, you can use the brush of the product itself or a skinny one. Intersperse the colours and, to mix them, give light taps with the sponge. Finally, seal with the extra shine or top coat.
In Nail Stretching
You can also do Tie dye nails decoration in stretches. The step-by-step done in the salon can be the same as above, but it can also include other techniques to master (the) manicure.
Infant
Tie-dye is a proposal for all ages; children usually have fun with it too. However, it is worth mentioning that the help of an adult is essential.
In addition, the dermatological recommendation is to use water-based nail polish and hypoallergenic cosmetics. It is because the substances in traditional nail polishes are considered toxic to children’s skin, which is more sensitive.
Therefore, children can paint their nails with age-appropriate and dermatologically tested products. The suggestion is to use the sponge or water technique because they will have fun during production and have coloured nails.
Five Perfect Tie Dye Nails Products
Using the tie dye nails technique, you will need some essential items to have beautiful and colourful nails. Remember that it is always good to opt for quality products that will dermatologically test to avoid any mishap.
Here are the recommendations from the Healthy Minute editor for perfect, salon-worthy nails:
Polishing Sandpaper
The polishing file is recommended for polishing and finishing the nails. It provides polish; that is, it evens the nails, eliminates imperfections and adds shine. It is possible to find versions with four ends that provide polishing, levelling and gloss.
Basis
In addition to preparing the nails to receive the enamel, the base helps the fixation and prevents the pin from being in direct contact with the product. Always opt for strengthening, nourishing or strengthening bases for flawless enamel and healthy nails.
Nail polishes
Nail polishes are essential to put into practice the tie-dye technique. Although there are no colour rules, you can choose more vibrant tones, candy colours and earth tones, for example.
Extra Shine Or Top Coat
Both are products used to finish the production of nails. However, they have different functions. The top coat will finish the enamel, forming a protective film. It is responsible for intensifying the enamel tone and prolonging its duration.
As the name implies, the extra shine gives an extra layer of polish, in addition to what the enamel already brings, and can even correct minor imperfections.
Nail Polish Remover
Nail polish remover is also another essential product for nail art. The recommendation is to always opt for the remover and avoid acetone, as it is a solvent that compromises the nails’ health when constantly used.
You can find these and other products to rock nail arts on the Consulta R emédios platform! You buy, save and even receive your order at home in no time.
One of the most exciting things about tie dye nails is that each creation is unique, and the result is unexpected. Therefore, one of the main precautions in all the techniques mentioned is not to apply the enamel excessively.
Related Search
tie-dye nails with water
tie dye nails with toothpick
tie dye nails blue
tie dye nails salon